I present to you one of the best ways to cook up crispy chicken thighs: Cracklin’ Chicken!

Table of Contents
- A crispy chicken thigh recipe that the whole family loves!
- A healthier way to make fried chicken!
- Key tips for crispy chicken thighs
- Can you make Cracklin’ Chicken in an air fryer?
- Ingredients
- How to make crispy chicken thighs
- How do you save leftovers?
- What’s the best way to reheat Cracklin’ Chicken?
- What can you serve as a side dish?
- More crispy chicken thigh recipes
- The Best Crispy Chicken Thighs: Cracklin’ Chicken Recipe
A crispy chicken thigh recipe that the whole family loves!
Longtime readers of this blog (and owners of my yellow cookbook!) know that my younger son is a picky and headstrong little guy who wasn’t exactly keen on this whole Paleo thing. At the age of three, he almost ran away from home when the whole-grain mac & cheese disappeared from our cupboard.

The transition wasn’t smooth, but with persistence and patience, we got our whole family eating the same dishes at mealtimes. Obviously, compromise is a necessity, and I do my best to make dishes we all can agree on. When I ask the kids for suggestions, Lil-O always asks for Cracklin’ Chicken. (We even renamed this recipe Ollie’s Cracklin’ Chicken in our yellow cookbook!)
A healthier way to make fried chicken!
Cracklin’ Chicken’s one of my favorite dishes, too. These crispy-on-the-outside, tender-and-juicy-on-the-inside boneless chicken thighs are quick and easy to prepare, and taste fantastic with whatever seasoning I have on hand—even if it’s just salt and pepper. And for those of you who care, this recipe’s gluten-free, Whole30-, and keto-friendly to boot!

Key tips for crispy chicken thighs
- Buy bone-in, skin-on thighs—they’re inexpensive. Plus, the bones are easy to remove, and the crispy skin is what makes this dish. I vastly prefer thighs over breasts for this recipe—to me, breasts tend to dry out and end up more bland.
- Use a pair of sharp kitchen shears to remove the bones. (Reserve the bones in the freezer for your next batch of bone broth!)
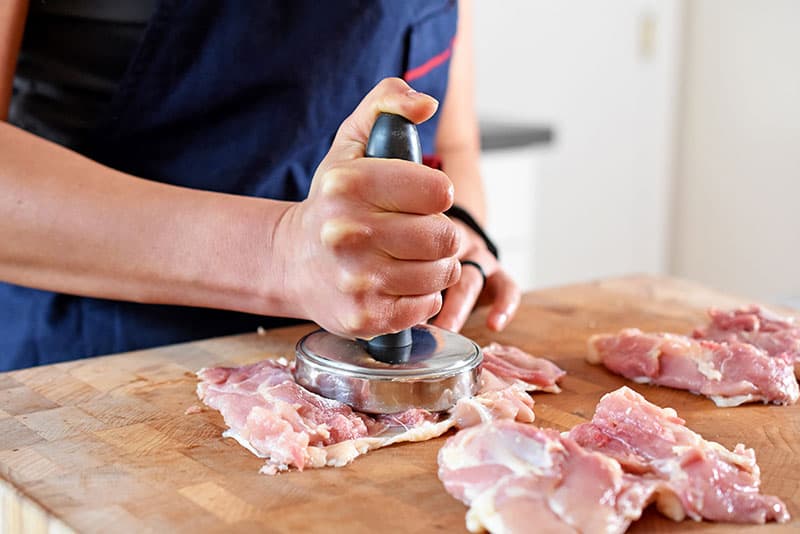
- Smash the thighs so they are even thickness with this nifty meat pounder! This way it will cook evenly and quickly.
- Dry the chicken thighs well, and season both sides of the thigh with salt, but ONLY the meat side gets additional seasoning and/or pepper. If you put other seasonings on the skin, it’ll run the risk of burning. Then, everyone will be sad. Tears are not tasty.
- Use a splatter guard to keep your stovetop clean! I really like using the Frywall these days.
Can you make Cracklin’ Chicken in an air fryer?
Yep! Make it with little or no mess in an air fryer by following this recipe! You can bake these chicken thighs in the oven, but the skin won’t get quite as crispy!
Ready for my fool-proof method for a flavor-packed, kid-approved chicken dinner?
Ingredients
- Skin-on, bone-in chicken thighs: Yes, you need the skin-on chicken thighs, but not the bone! I show you how to debone the thighs below, but you can also buy skin-on, boneless thighs at your local Japanese market. Please don’t substitute chicken breasts because they get overcooked. And don’t use boneless skinless chicken thighs because nothing will get crispy!
- Diamond Crystal kosher salt: I only season the skin with salt so it won’t burn when you crisp it up.
- Ghee, avocado oil, or your favorite high temperature cooking fat
- Seasoning blend of choice: If you want, you can season the meaty side of the thigh with your favorite seasoning blend. I love using one of buy Nom Nom Paleo spice blends—all four of them work perfectly! They’re available at The Spice Lab (a.k.a. Spices.com) and you can buy the whole Nom Nom Paleo spice blend collection! You can also buy them on Amazon!
How to make crispy chicken thighs
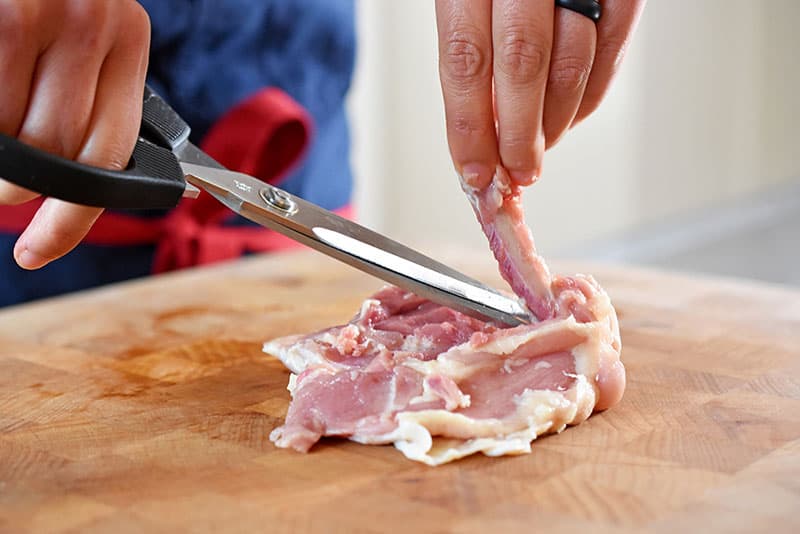
Grab some chicken thighs and a sharp pair of kitchen shears. Pat the chicken dry with a paper towel. Then, starting at one end, carefully cut out the bone, making sure you don’t cut through the meat. Stay as close to the bone as possible.
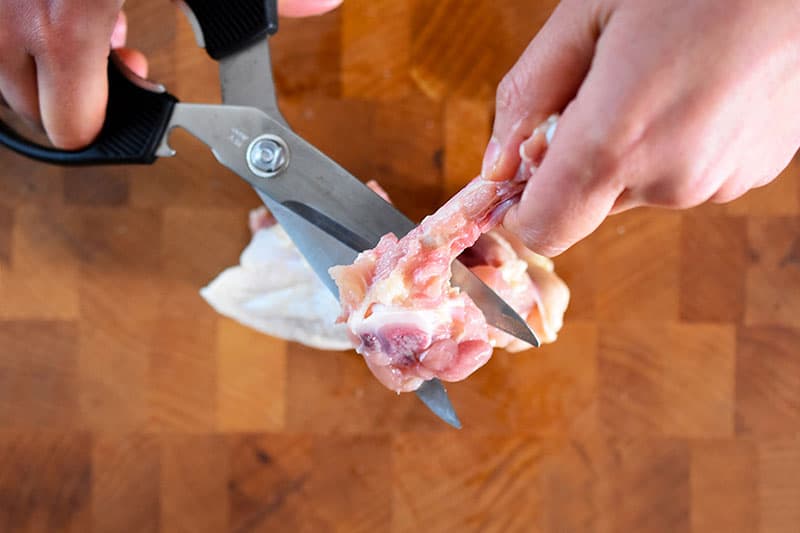
When you get to the other end, trim around the joint and cartilage and remove the bone.
Keep a container handy to save the bones for bone broth. Your mom will high-five you for being frugal. (Or, if you have my mom, she’ll fist bump you. Okay, not really. She’ll just nod approvingly after you’ve turned away.)
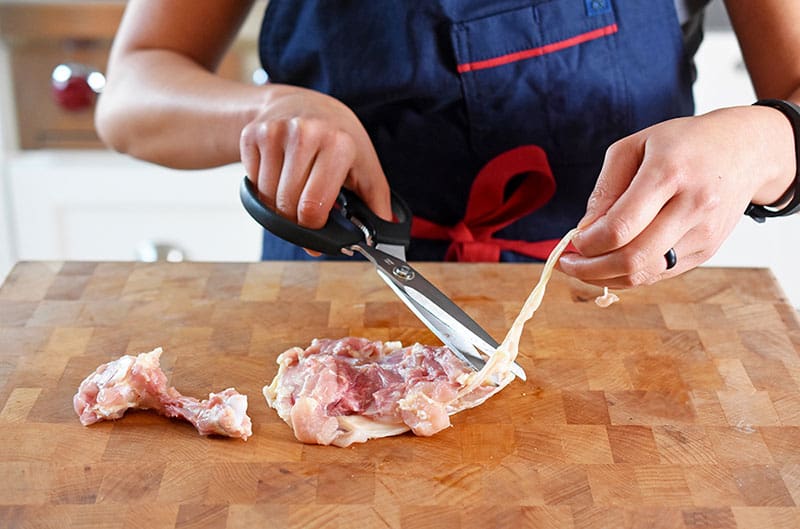
If extra skin or fat is flapping around and hanging off the thighs, you can trim it off as well. But don’t cut too much away, because the skin will shrink when you fry it.
Believe me: You don’t want to skimp out on the cracklins’. (Yes, I have a chicken skin chips recipe!)
Flatten the chicken with a meat pounder (or cut a gash in the thickest part of each thigh piece with your scissors) to ensure uniform cooking.
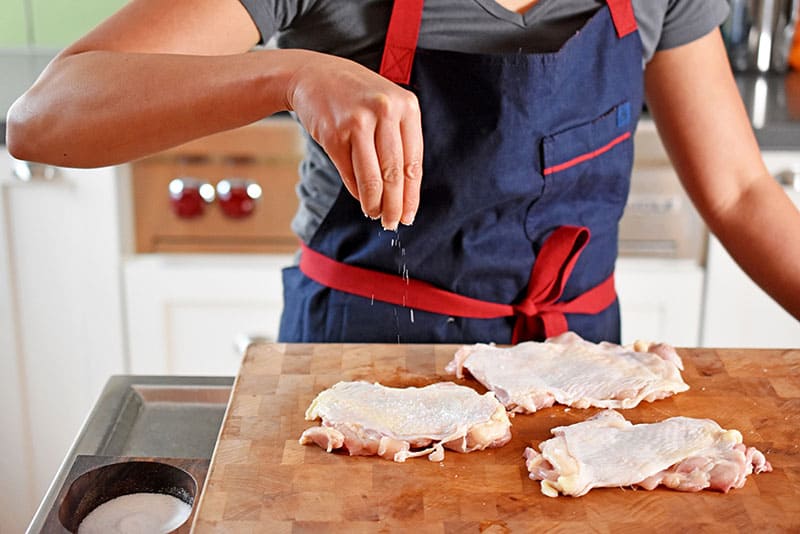
Turn the chicken skin-side-up, and sprinkle salt on the skin from way up high, like it’s snowing. That way, the skin will be seasoned evenly. (Don’t believe me? Listen to Thomas Keller then. Did you know that he allegedly flirted with Paleo while on his Bouchon Bakery book tour? And did you know that I started that rumor?)
Heat a large cast iron pan over medium high heat.
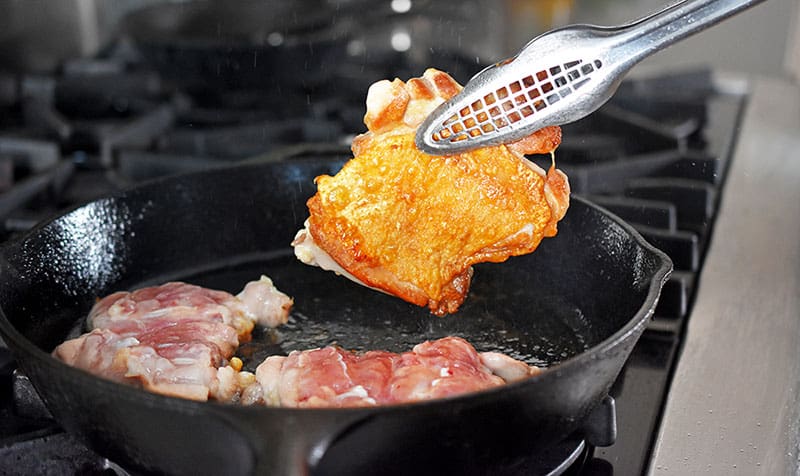
Melt the ghee in the pan and place four chicken thighs skin-side down in the hot pan.
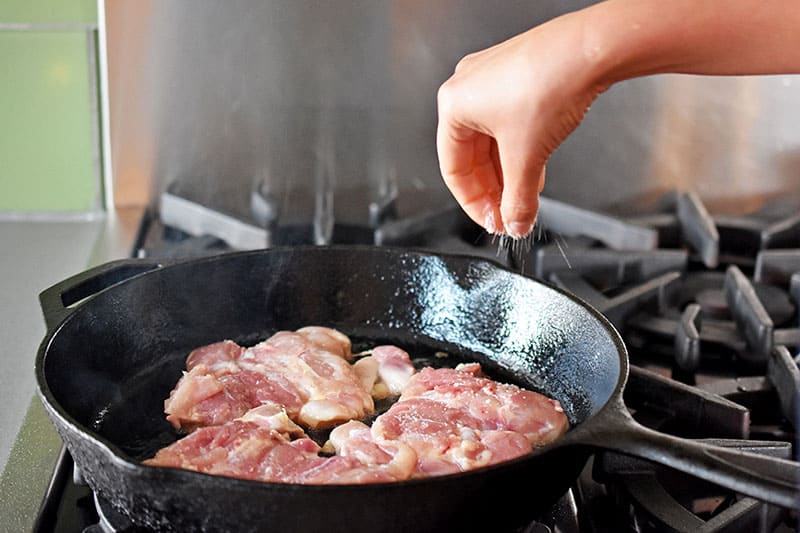
Season the meat side with your favorite seasoning blend (I’m a fan of using my own special Magic Mushroom Powder, which the Oregonian’s Test Kitchen has proclaimed “truly magic, adding much-desired umami to everything it touches.”) If your seasoning blend of choice doesn’t include salt, you may want to add a bit more kosher salt to the chicken.
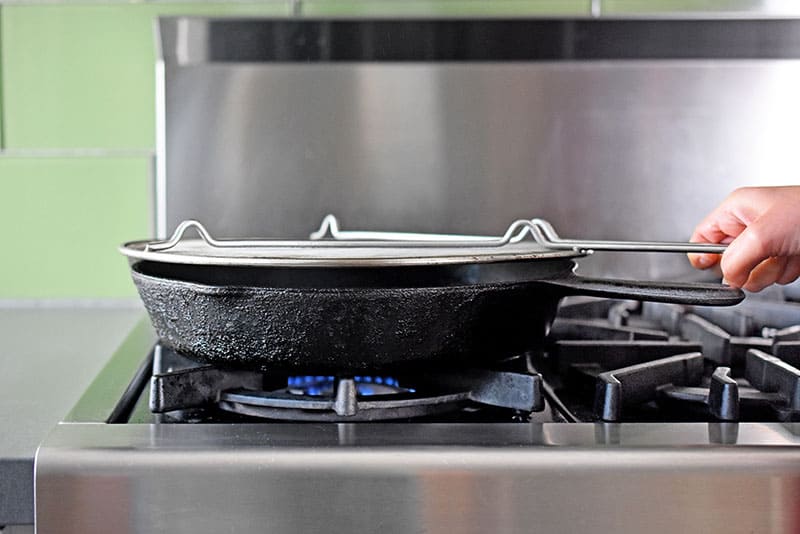
Let the skin fry undisturbed until crispy and golden brown (around 7-10 minutes), rotating the pan 90 degrees at the halfway point to make sure the heat from the burner is uniformly distributed.
Pro tip: Cover the pan with a splatter guard to keep your stove (relatively) clean. (Recently, I started using a Frywall which keeps my stovetop waaaaay cleaner than a traditional splatter guard.) Otherwise, line your floor in front of the stove with towels, or the deliciousness of Cracklin’ Chicken will come with a slick, oil-splattered price!
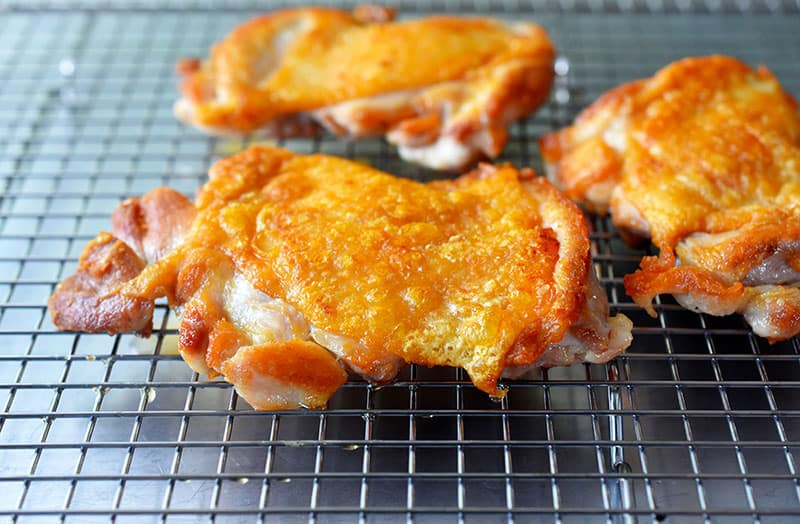
Flip the chicken and cook for 3 more minutes or until cooked through. (If you’re not sure, grab an instant-read thermometer and check that the internal temperature of the thickest part of the thigh reaches 175°F to 185°F.)
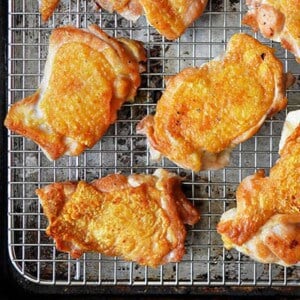
Transfer the chicken to a wire rack and rest ’em for 5 minutes.
Repeat the steps above with the four remaining thighs.
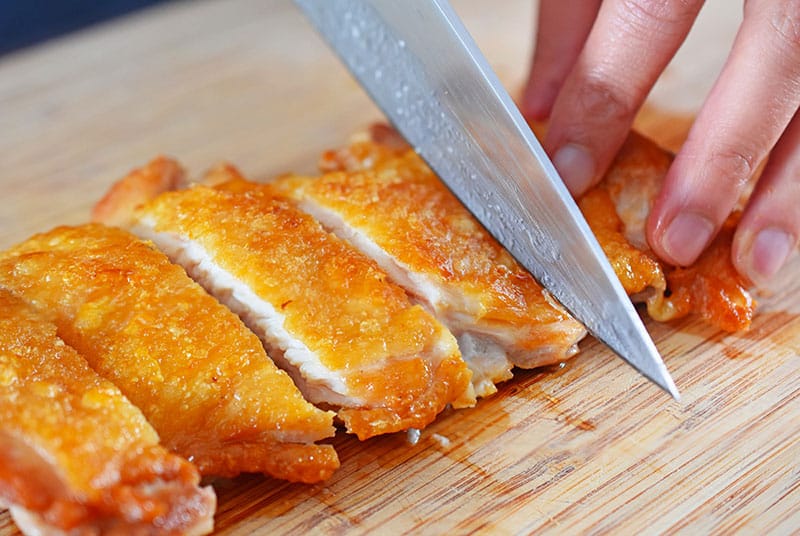
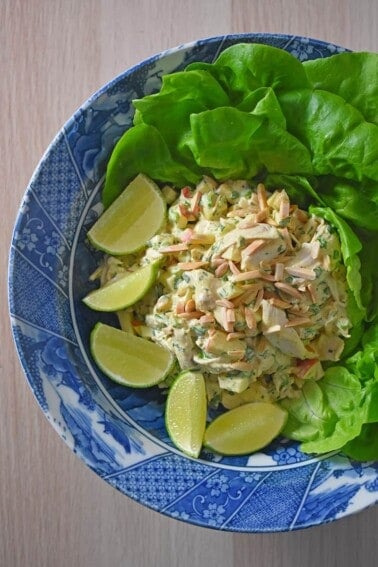
When you’re ready to eat, slice them up and dig in!
How do you save leftovers?
Leftover Cracklin’ Chicken can be stored in an airtight container in the fridge for up to four days.
What’s the best way to reheat Cracklin’ Chicken?
Here’s how to reheat Cracklin’ Chicken: lay the pieces skin-side down in a hot skillet for 1-2 minutes (or until the skin re-crisps) and then flip them over for another 1-2 minutes to heat through. Alternatively, you can throw them in an air fryer at 400°F for about 4 to 5 minutes or until the skin gets crispy and the meat is heated through.
What can you serve as a side dish?
More crispy chicken thigh recipes
Looking for more recipe ideas? Head on over to my Recipe Index. You’ll also find exclusive recipes in my cookbooks, Nom Nom Paleo: Food for Humans (Andrews McMeel Publishing 2013), Ready or Not! (Andrews McMeel Publishing 2017), and Nom Nom Paleo: Let’s Go! (Andrews McMeel Publishing 2022).
PRINTER-FRIENDLY RECIPE CARD
The Best Crispy Chicken Thighs: Cracklin’ Chicken
Ingredients
- 4 pounds chicken thighs skin-on, bone-in
- 1 tablespoon Diamond Crystal kosher salt
- 2 teaspoons ghee
- 2 teaspoons Magic Mushroom Powder or your favorite Nom Nom Paleo seasoning blend (optional)
Instructions
- Blot the chicken dry with a paper towel. Then, starting at one end of each thigh, use a sharp pair of kitchen shears to carefully cut out the bone, making sure you don’t cut through the meat. Stay as close to the bone as possible. When you get to the other end, trim around the joint and cartilage and remove the bone.
- If extra skin or fat is flapping around and hanging off the thighs, you can trim it off as well. But don’t cut too much away, because the skin will shrink when you fry it.
- Flatten the chicken with a meat pounder (or cut a gash in the thickest part of each thigh piece with your scissors) to ensure uniform cooking.
- Turn the chicken skin-side-up, and sprinkle salt on the skin.
- Heat a large cast iron skillet over medium high heat. Melt the ghee in the pan and place four chicken thighs skin-side down in the hot pan.
- Season the meat side with your favorite seasoning blend. If your seasoning blend of choice doesn’t include salt, you may want to add a bit more kosher salt to the chicken.
- Let the skin fry undisturbed until crispy and golden brown (around 7-10 minutes), rotating the pan 90 degrees at the halfway point to make sure the heat from the burner is uniformly distributed.
- Flip the chicken and cook for 3 more minutes or until cooked through. Transfer the chicken to a wire rack and rest ’em for 5 minutes.
- Repeat the steps above with the four remaining thighs. When you’re ready to eat, slice them up and dig in!
Video
Notes
Nutrition
Nutrition information is automatically calculated, so should only be used as an approximation.


I have been making this recipe for a couple years now and it has LITTERALLY become my grown children’s, and grandchildren’s, FAVORITE!!! Like birthday dinner pick favorite! So simple but SO GOOD!!! Learning to remove the bone from thighs was also life changing since I now do it in LOTS Of other recipes! Thank you SO MUCH!
I’ve made this recipe several times and it is a winner! If you love juicy, yet crispy chicken thighs give this a try!
Everyone loves them
I can definitely recommend de-boning the thighs. I made a batch last night feeling lazy and did not remove the bones. Had to finish in the oven… still bloody in the middle!
A favorite at our house! Easy and very good!
These always turn out delicious, but I keep finding that even if I flatten the thighs before cooking, they sort of contract and plump up again as soon as they hit the pan. The larger the piece, the more it thickens. With very big pieces, it ends up being difficult to make them cook through because they are so thick. I am going to try cutting larger thighs into smaller pieces next time.
Another option is to make a few 0.5-inch deep cuts on the meat side of the larger thigh pieces so the meat can cook through faster!